Getting your DoorDash merchant tablet set up is quick and straightforward, so you can start taking orders and serving your customers without missing a beat. In this guide, you’ll find everything you need to get your DoorDash Tablet ready, from customizing settings to fit your team’s needs to making sure your menu is good to go. Whether you’re new to DoorDash or just looking for a refresher, setting up your tablet will help you keep track of your incoming, existing, and scheduled orders–all in one place. Please note that the tablet experience may vary.

“Everything from the pre-set menu to setting up the tablet was well thought-out. It was breezy to get up and running.”
How do I review my menu on my DoorDash Tablet?
Before reviewing your menu on your tablet, make sure that you first set it up on the Merchant Portal. Make the final approval of all the items on your menu using your DoorDash merchant tablet to make sure it reflects everything available in your store.
If you’ve already reviewed your menu on the portal, tap I Already Reviewed It.
If you haven’t reviewed it yet or don’t know what that means, tap Review My Menu.
If you need to review your menu, you’ll find all your categories listed on the left-hand side of the screen.
Tap a category to view all the items in that category at once.
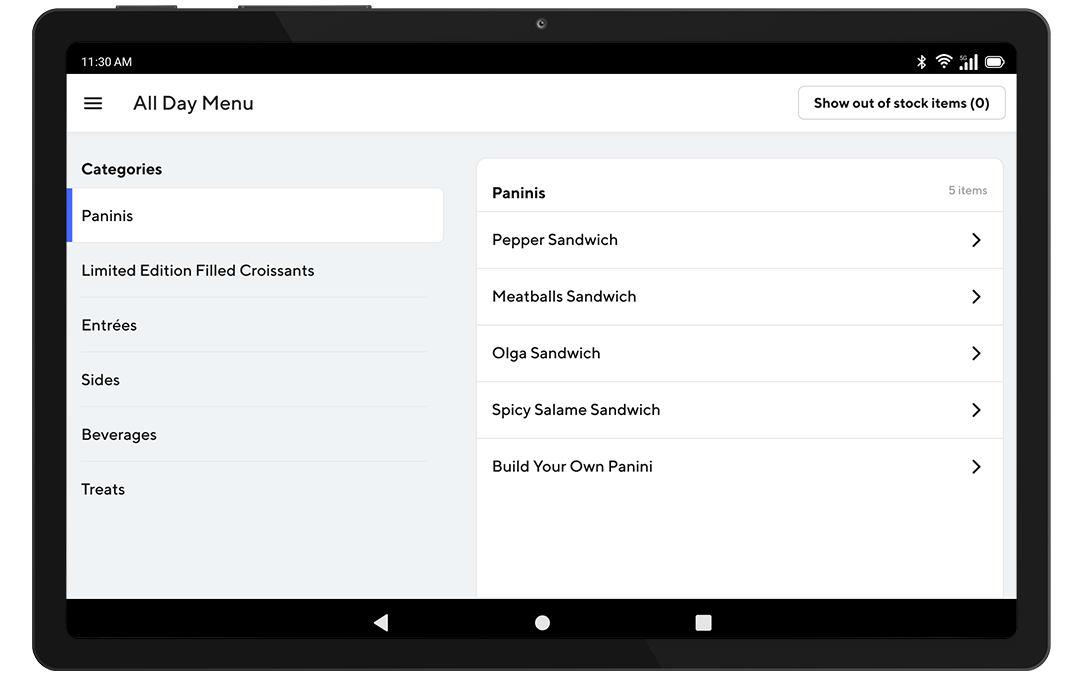
5. Tap an individual item to see its details.
How do I set an item’s availability?
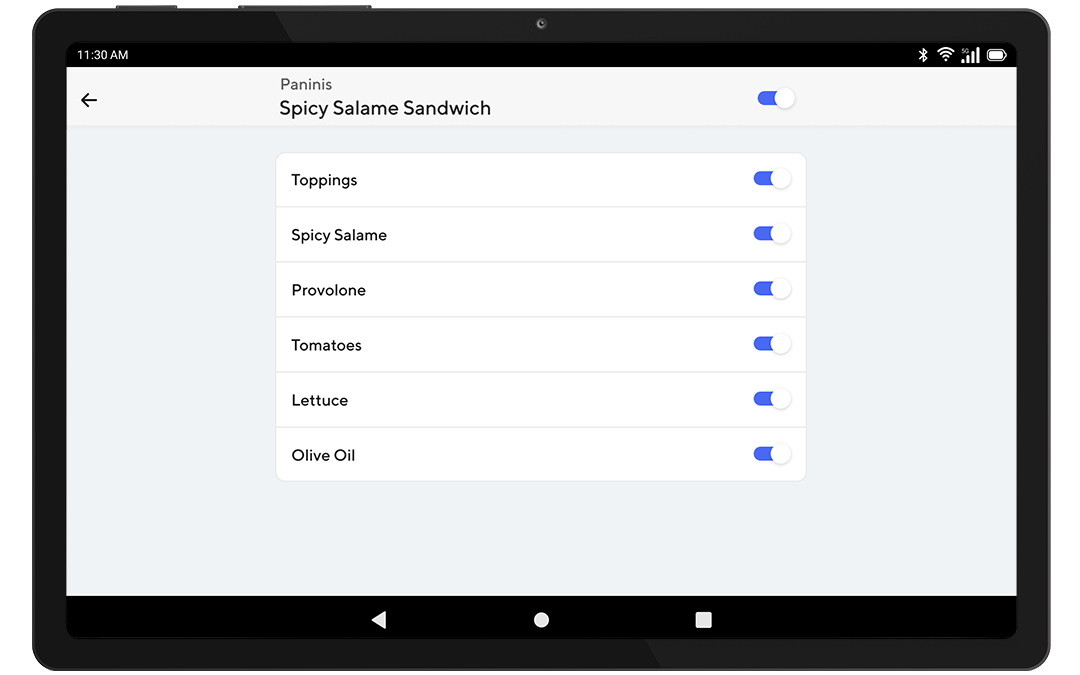
Tapping into an individual item will display the options associated with that item.
1. If any of these optional items are out of stock, switch the In Stock toggle next to the item.
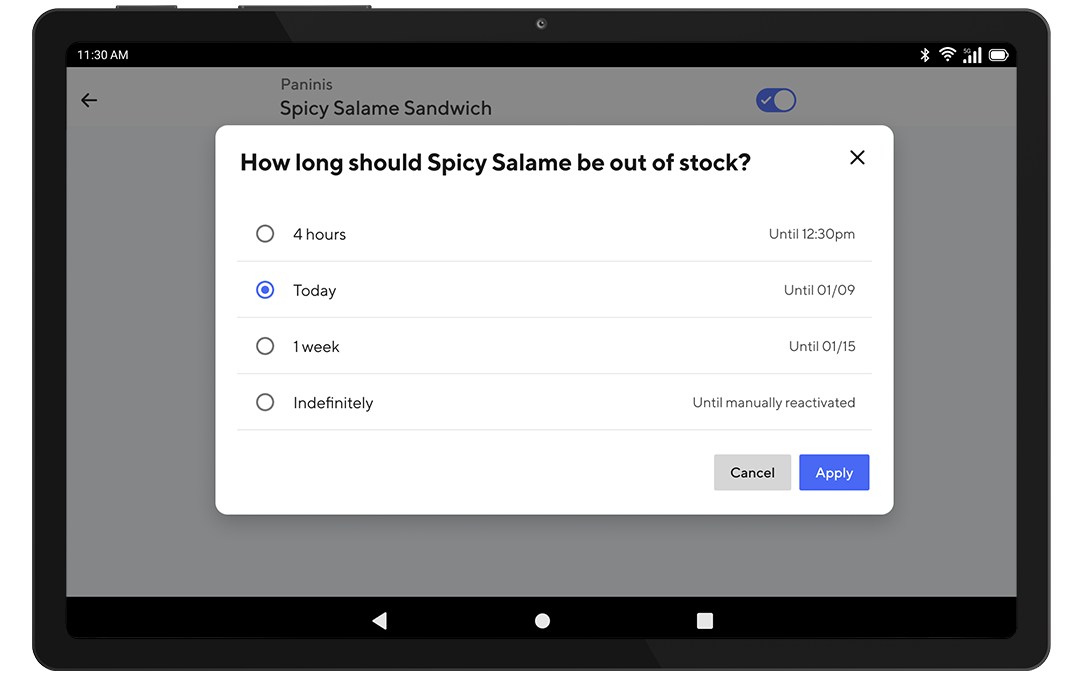
2. Select the period of time you want an item to be listed as out of stock, then tap Apply. Once your store goes live, you’ll be able to edit these settings at any time using your tablet.
How do I approve my menu on my DoorDash restaurant tablet?
If everything reflects what’s available in your store, then you’re ready to approve your menu.
Once you’ve reviewed your menu, tap I Have a Few Edits if you still want to make edits.
If you have no further changes, tap Yes, Looks Great.
How do I go live with my menu?
Once you’ve reviewed your menu and everything looks good, then you’re ready to go live.
Tap Go Live to get your store live on the DoorDash platform.
Go live during your store open hours, so your customers will be able to find and order from you right away.
How do I create a test order on my DoorDash Merchant tablet?
Creating a test order is a great way to double-check your store is set up accurately and familiarize yourself with order flow.
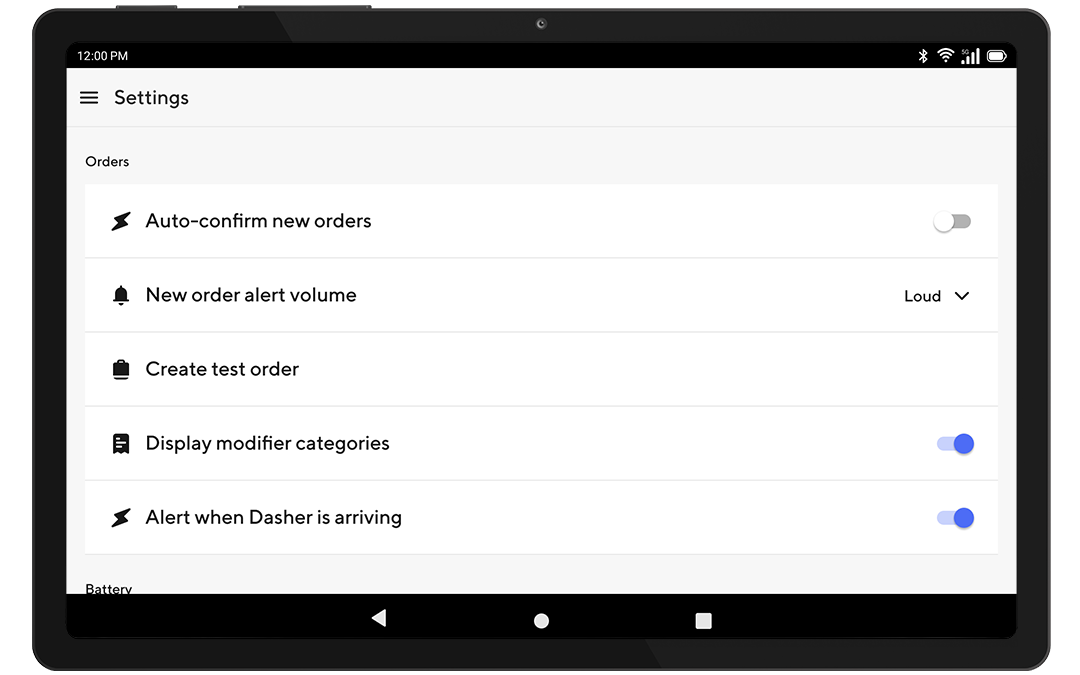
1. Head over to Settings and tap Create test order to initiate the test order process.
2. As you review your store, put yourself in the shoes of your customer and think about if there is any way to improve your customer experience.
Now that your DoorDash restaurant tablet is all setup, you’re ready to jump in and start taking orders! With this setup, handling orders, updating your menu, and managing availability becomes second nature. This tablet is more than just a tool; it’s here to help make your day-to-day smoother and give you more time to focus on your customers. Enjoy the confidence of knowing your DoorDash Tablet is set to keep things running and provide a single source of truth on all your DoorDash orders.
Log in to the PortalReady to update store details on your tablet? Learn How to Manage Your Store Through Your DoorDash Tablet.
